
Using KalturaCapture for the first time
- Log into Canvas and select My Kaltura Media from the red global navigation menu.
- You may need to authorize Kaltura.
- Select the blue “Add New” button in the top right corner.
- Select “Kaltura Personal Capture.”
- Depending on your computer type, you must download the software for Windows or MAC. Follow the installation directions.
- Then return to Canvas My Kaltura Media and select “Add New” and “Kaltura Personal Capture” again.
To launch Kaltura and create new video with KalturaCapture from within Canvas:
- Log into Canvas and find “My Kaltura Media.” “My Kaltura Media” can be found on the red global navigation bar on the left.
- Click the “Add New” button at the top right of the screen
- Select “Kaltura Personal Capture”
- If you’ve already installed KalturaCapture, wait a moment; it will launch automatically, or you may be prompted to “Open Kaltura Capture.”
- Select the icons of which items you’d like to record. By default, if your computer is equipped with everything, KalturaCapture will record your screen, webcam, and microphone (icons displayed in this order from left to right).

- Note: You can click on the icon to toggle the specific tool on or off (for instance, click on the camera to turn off the webcam). If you have multiple webcams, screens, or microphones available, you can click on the drop-down menu icon to the right of each icon to select which one you’d like to use. This could be particularly useful if you’re using a headset with a microphone and you don’t want to use the computer’s built-in microphone.
- When an icon is turned off, it will display as gray with a slash.
- Recording the full screen or only an area of the screen: You can choose to record your entire screen or only a specific portion. Click on the down-pointing caret to the right of the computer icon to select the appropriate option for your recording.
- Once you have made the selections to record your video, click the red circle Record button.
- You’ll get a 5-second countdown before the recording starts.
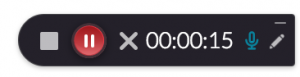 A timer will display in the bottom right-hand corner of your screen. This will also allow you to stop, pause, or cancel the recording.
- Click the gray square button to stop the recording. Select “Yes, Stop it” when asked if you are sure you’d like to stop this recording.
- A black box will appear with a thumbnail of the recording. You can hit the play button beneath the thumbnail if you’d like to preview the recording.
- Type the name of your new video under the “Title” option and click “Upload and Save” to save it to the Kaltura streaming server.
- The video description and tags are not required.
- The video will now appear in the “My Kaltura Media” page within Canvas. Sometimes, it can take a few minutes for the video to appear. If it doesn’t appear immediately, try waiting five minutes and refreshing your browser.
This video shows an instructor how to create a video lecture, but the process is the same for a student.
Submitting your Kaltura video as an assignment in Canvas
Your professor should set it so you can submit your video as a text box entry in Canvas. You will see a text box where you can embed your Kaltura video submission. Here’s how you can do that:
Embed a Kaltura video: Look for the “Tools” menu at the top of the toolbar

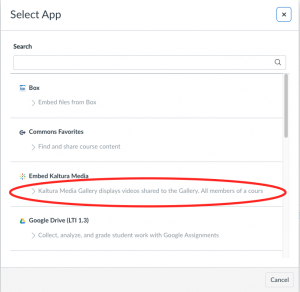
The first time you click on Tools, click Apps and then “View all.” A menu will appear (see image below). Click the text below Embed Kaltura Media. You should then be able to select a video to embed in the text editor. This will also add “Embed Kaltura Media” to your Tools menu.
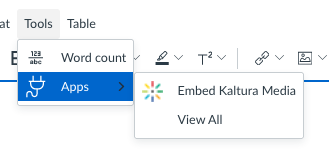
Next time you click Tools and then Apps, you’ll see the Embed Kaltura Media option:
After you click Embed Kaltura Media, a window will appear where you can select the video you have uploaded. Once the video appears in the text box, submit your assignment.